
Replacing a Shower Door Sweep: A Quick DIY Guide to Stop Leaks
Published by Glass Mirror Pro | Expert Glass & Mirror Solutions
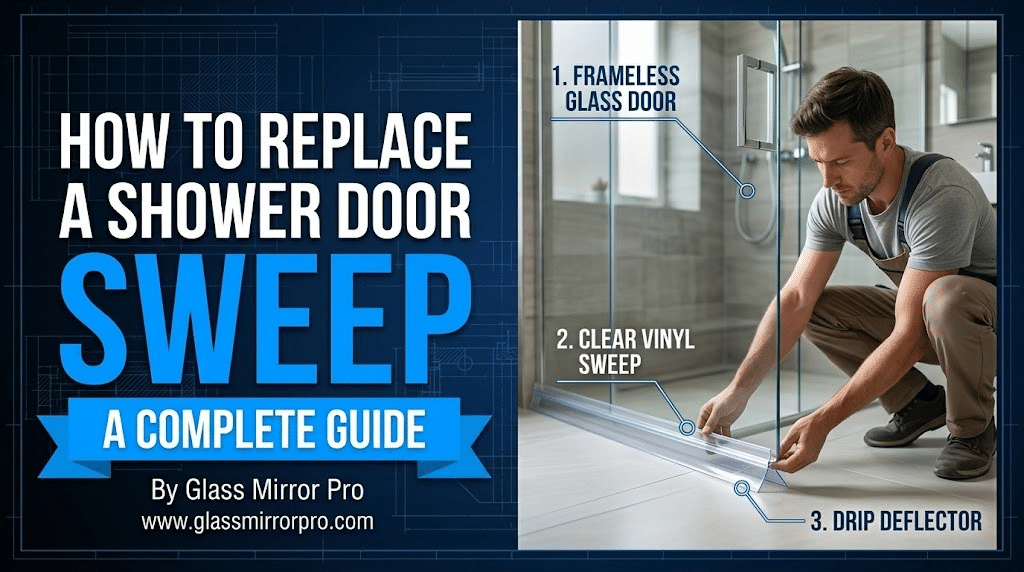
Stepping out of a relaxing, hot shower only to step into a massive puddle of water on your bathroom floor is incredibly frustrating. If water is escaping from your frameless shower enclosure, there is a very high chance your bottom door sweep has failed. A shower door sweep is the clear plastic and vinyl strip that clips onto the bottom of the glass to bridge the gap between the door and the curb. Over time, friction, hard water, and mildew cause these sweeps to yellow, crack, and tear. Fortunately, replacing a shower door sweep is one of the easiest, cheapest DIY projects you can tackle to restore your bathroom’s watertight seal.

1. Measuring Your Glass for the Right Fit
You cannot buy a one-size-fits-all sweep. Before heading to the hardware store or ordering online, you need two critical measurements. First, measure the thickness of your glass door. Frameless shower doors are almost exclusively cut from tempered safety glass in either 3/8-inch (10mm) or 1/2-inch (12mm) thicknesses. If you buy a 3/8-inch sweep for a 1/2-inch door, it will not snap on. Secondly, measure the physical gap between the bottom edge of the glass and your tiled shower curb. You need a sweep with vinyl drip fins long enough to securely bridge that gap without dragging heavily across the tile.
2. Removing the Old, Grimy Sweep
In most frameless enclosures, the polycarbonate sweep is held on purely by friction and tension. Open the shower door, grasp the sweep firmly at one end (near the hinges), and pull straight down. It should pop right off the bottom edge of the glass. If the sweep is incredibly old, it may have calcified due to hard water scale and become stubbornly stuck. If it resists, gently pry it downward using a plastic putty knife. Never use a metal screwdriver or hammer! Tapping the fragile bottom edge of tempered glass with hard metal can cause the entire door to instantly shatter into thousands of pieces.
3. Thoroughly Cleaning the Glass Edge
Do not snap a brand-new sweep onto a dirty piece of glass! Once the old sweep is removed, you will likely find a line of hard water stains, soap scum, and pink or black mildew trapped along the bottom inch of the door. The Environmental Protection Agency (EPA) notes that trapped moisture is the primary catalyst for mold growth in bathrooms. Scrub the bottom edge of the glass thoroughly with a 50/50 mixture of white vinegar and water, or a specialized hard water stain remover. Dry the glass completely with a microfiber cloth to ensure the new sweep grips the glass perfectly.
4. Cutting and Snapping on the New Sweep
Replacement sweeps usually arrive in a standard 36-inch length and will need to be trimmed to match the exact width of your door. Measure the width of your glass door (or simply hold the old sweep up to the new one as a template). Use a small hacksaw or heavy-duty aviation snips to cut the hard polycarbonate spine to length. Once trimmed, align the new sweep starting at the hinge side of the door. Push upward firmly with the heel of your hand, working your way across the width of the door until the sweep “clicks” securely onto the glass bottom. Close the door to verify the fins seal tightly against the curb without binding.
Time for a Complete Bathroom Upgrade?
Replacing a sweep fixes a minor leak, but if your shower glass is permanently clouded by hard water etching, deeply scratched, or structurally unstable, a piece of plastic won’t solve the problem. Upgrade your bathroom experience with a luxurious, brand-new custom enclosure! The experts at Glass Mirror Pro precision-cut heavy-duty, crystal-clear tempered shower glass panels tailored directly to your home’s exact dimensions.


Leave a comment