
The Ultimate Guide to RV Window Replacement: Upgrade Your View on the Road
Published by Glass Mirror Pro | Expert Glass & Mirror Solutions
Life on the road is all about the scenery, but a cracked, foggy, or drafty window can quickly ruin the view—and your comfort. RV windows endure a tremendous amount of stress. Constant vibration from the highway, extreme temperature fluctuations, and exposure to harsh weather eventually take a toll on the glass and the seals. Whether you are dealing with a shattered pane from flying highway debris or upgrading to energy-efficient dual-pane glass, an RV window replacement is a critical project that protects the interior of your rig and enhances your travel experience.

1. Understanding RV Window Types
Before you begin the replacement process, it is vital to identify the type of window currently installed in your motorhome or travel trailer. The most common styles are sliding windows, awning (or louvered) windows that crank outward, and fixed picture windows. Additionally, you must know whether your rig uses single-pane or dual-pane glass. According to the RV Industry Association (RVIA), dual-pane windows provide superior thermal insulation and noise reduction, making them highly desirable for full-time RVers and those camping in extreme climates.
2. How to Measure for a Replacement
Ordering the wrong size glass is the most common mistake made during an RV window replacement. The measurement you need is not the size of the glass itself, nor the size of the outer metal frame. You need the Rough Opening measurement. To get this, you must carefully remove the inner trim ring (usually held in by screws on the interior wall) to expose the actual hole cut into the RV’s sidewall. Measure the width and height of this hole exactly. Knowing the rough opening ensures the new frame will seat perfectly against the wall’s structure.
3. The Critical Requirement: Safety Glass
You cannot use standard residential window glass in a moving vehicle. Because an RV bounces and flexes while traveling down the highway at 65 MPH, standard annealed glass would quickly shatter into dangerous, jagged shards. The National Highway Traffic Safety Administration (NHTSA) mandates that automotive and RV windows must be constructed using tempered safety glass (or laminated glass for windshields). Tempered glass is engineered to withstand heavy impacts and, if broken, safely crumbles into small, blunt pebbles.
4. Sealing the Deal: Installation Basics
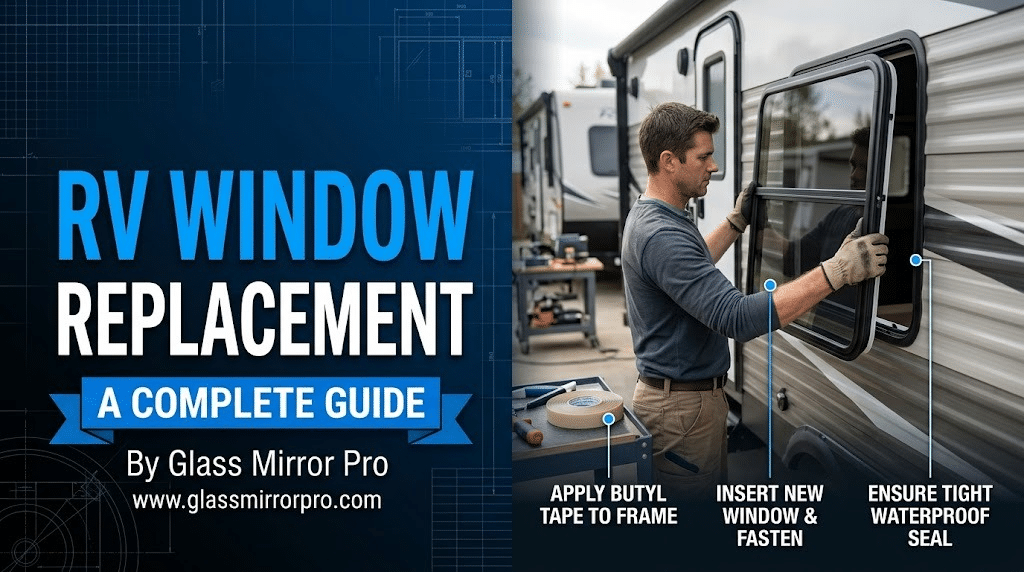
The success of your installation hinges entirely on the quality of your seal. Water intrusion is the number one enemy of any RV, leading to devastating delamination and mold. Before installing the new window, thoroughly clean the rough opening to remove all old sealant and butyl tape. Apply a fresh, continuous layer of high-quality butyl tape (putty tape) around the inner lip of the new window frame before pressing it into the exterior wall. Once screwed tightly into place, a bead of professional-grade, non-sag lap sealant around the top edge guarantees a weather-tight fit for years of travel.
Ready to Hit the Road with Clear Views?
Don’t let a cracked window or a failed, foggy seal ruin your next big adventure. Finding the exact, perfectly sized replacement glass for a specific RV model can be notoriously difficult. Skip the hassle of scouring salvage yards! The experts at Glass Mirror Pro will custom-cut and perfectly temper high-quality replacement glass to your exact specifications, ensuring your rig is road-ready and beautiful.


Leave a comment